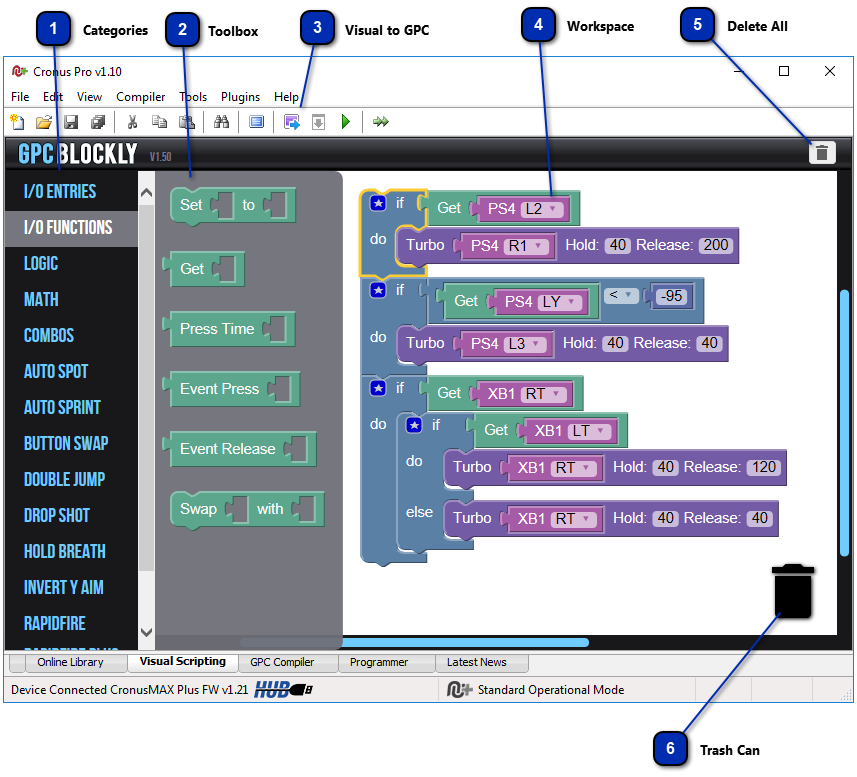
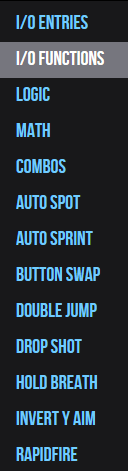
Categories The GPC Toolboxes are organized in categories. Clicking on the category name opens the corresponding Toolbox:
• I/O Entries: I/O is short for Input/Output. This toolbox includes the commands the CronusMAX receives from a controller connected to its input port and the commands it can output to a console/PC connected to its output port.
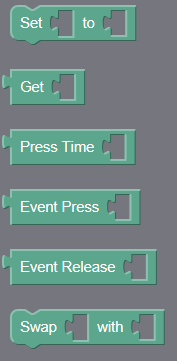
• I/O Functions: The Input/Output Functions toolbox includes a set of commands which are used in combination with the I/O Entries. These commands tell the CronusMAX how to communicate with the controller connected to its input port and how to manipulate the commands before sending them to an attached console/PC
• Logic: This toolbox contains blocks which are used for decision making. Such as the if/do box. This particular block will execute the command contained within the 'do' section if the command contained in the 'if' section is true.
• Math: The Math toolbox, as its name implies, contains blocks used for mathematical calculations and entering numeric values.
• Combos: This toolbox contains blocks used to send I/O Entries in a programmed sequence via the CronusMAX's output port.
The following are Pre-Made Scripts generated by our scripting professionals to help get you started
• Auto Spot: This pre-made script automates the task of pressing the 'Spot' button in game when you are looking down your sights. (Feature not available in all games).
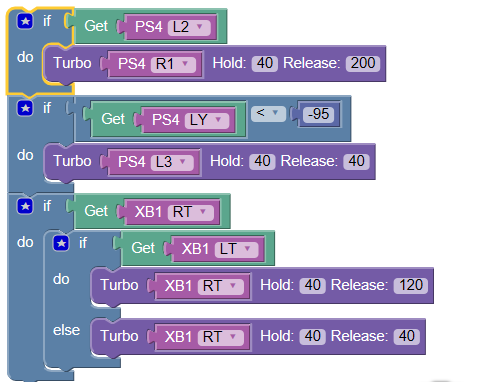
• Auto Sprint: The Auto Sprint script will automate the task for pressing the 'Sprint' button for you whenever the left stick is pushed past 95%. This is adjustable. Simply change the value '-95' to adjust when the sprint button is pressed. -100 is all the way forward and -20 would press the button as soon as you character starts to move.
• Button Swap: This toolbox contains blocks which will swap LB/L1 with LT/L2 and RB/R1 with RT/R2. These blocks can quickly be customized by changing the purple I/O entries.
• Double Jump: This script automates the task of double pressing the A/Cross button. It will automatically press the button a second time when it has only physically been press once.
• Drop Shot: The Drop Shot script with automatically press the Crouch button (B/Circle) when the trigger button (RT/R2) is held for less than 1500 milliseconds (1.5 seconds).
• Hold Breath: The blocks in this toolbox will automatically press the 'Hold Breath' button (LS/L3) whenever the ADS button (LT/L2) is pressed equal to or greater than 95%. This is usually when sniping in many games.
• Invert Y Aim: The script here will invert the Right Stick, which is commonly used to look in game. This is extremely helpful to those whom like to play with an inverted right stick and the game is lacking the option.
• Rapid Fire: The Rapid Fire blocks will automatically rapidly press and release the RT/R2 button at a predefined speed whenever the button is held down. The speed can be quickly be adjusted simply by changing the values in the Hold and Release sections of the Turbo block.
• Rapid Fire Plus: The blocks in this toolbox perform the same task as the Rapid Fire blocks, however, they add an extra level of customization. You can set the Rapid Fire to only operating when looking down the sights or create two different Rapid Fire speeds. One for when you are looking down your sights and one for when you are not.
• Quick Scope: The Quickscope script will automatically fire your gun when you simply tap the ADS button (LT/L2).
|